In the realm of large-scale customer-centric applications, the importance of sending emails cannot be overstated. It serves as a vital, cost-effective, and user-friendly communication tool, especially for notifying users about crucial application events like account activation, password changes, and user verification. Node.js, a perennial favorite among programming languages, continues to be a top choice for enterprises tackling challenges in building resilient applications. This article explores four distinct methods for sending transactional emails using Node.js, shedding light on the pros and cons of each approach.
Method 1: Using the Nodemailer Module
1.1 Installation and Setup
Before diving into the Nodemailer magic, let's kick things off by installing the module. Open your terminal and run the following command:
Or if you prefer Yarn:
Once installed, let's set up Nodemailer in your Node.js application. Create a file, let's call it emailSender.js:
1.2 Creating a Nodemailer Transporter
The createTransport function in Nodemailer configures the email transport method. Here, we use Gmail as our SMTP service. Replace 'your-email@gmail.com' and 'your-email-password' with your Gmail credentials.
1.3 Setting Message Options
The mailOptions object defines essential email parameters such as sender, recipient, subject, and text body. Customize it based on your needs.
1.4 Sending Emails with Attachments
Nodemailer makes it easy to attach files to emails. Let's enhance our example to send an email with an attachment:
1.5 HTML Emails with Dynamic Content
Sending HTML emails with dynamic content is a breeze with Nodemailer and the email-templates package. Install it using:
Or with Yarn:
Create a folder named templates with subject.pug and html.pug files inside. Let's update our emailSender.js:
Ensure that your directory structure looks like this:
In the next response, we'll cover Section 2: Sending Emails with Gmail, including Gmail SMTP configuration and authentication methods.
Method 2: Sending Emails with Gmail SMTP
2.1 Gmail SMTP Configuration
Now, let's explore sending emails using Gmail SMTP, a secure and reliable method.
Firstly, install Nodemailer if you haven't already, using above shared method in 1.1:
In your Node.js application, create a file, let's call it gmailSender.js:
2.2 App Password for Enhanced Security
To authenticate with Gmail SMTP securely, it's recommended to use an App Password. Follow these steps:
- Go to your Google Account Security.
- Under "Signing in to Google," enable "2-Step Verification" if not enabled.
- In the "Signing in to Google" section, click on "App Passwords."
- Select "Mail" in the "Select app" dropdown and "Other (Custom name)" in the "Select device" dropdown.
- Click "Generate."
- Copy the generated password and use it in the gmailSender.js file.
2.3 Sending an Email with Gmail SMTP
Now, let's modify our gmailSender.js file to send a test email:
2.4 Advanced Usage: oAuth2 Authentication
For enhanced security, consider using oAuth2 authentication. It involves obtaining an access token. Here's a basic example:
Method 3: Sending Emails using a Transactional Email API (e.g., SendGrid)
Step 1: Sign Up for SendGrid and Create API Key
- Sign up for SendGrid and create an API key with full access.
- Install the SendGrid JavaScript client with npm:
Step 2: Create a SendGrid API Key
Step 3: Send Email with SendGrid
Method 4: Using SuprSend - Third-Party Multichannel Notification Infrastructure with Node SDK
A third-party multichannel notification infrastructure provider, such as SuprSend, presents an avenue for sending cross-channel notifications through a unified API, covering various channels like Emails, SMS, and Push Notifications. SuprSend streamlines the notification flow by managing all relevant channels and providers seamlessly through a single API, eliminating the need for extensive coding.
Key Features & Benefits:
- Extensive Integration Options: Seamless integration with 50+ Communication Service Providers (CSPs) and across 6+ communication channels, like Mixpanel, Segment, Twilio, Mailchimp, Slack, Teams, SNS, Vonage, Whatsapp and more.
- No Tech Dependency: End-to-end notification management without involving the engineering team, optimizing their productivity. Just integrate the Node SDK once, and your product team will manage everything else.
- Intelligent Routing: Create and implement intelligent cross-channel flows across providers without technical dependencies.
- In-App SDK: Provides a fully loaded, developer-ready in-app layer for both web and mobile applications.
- Granular Template Management: Utilize an intuitive drag & drop editor for designing templates, offering superior control over the content.
- Powerful Workspace: Efficiently manage various projects with distinct integrations, workflows, and templates in each workspace.
- Unified Analytics: Track, measure, and make data-driven decisions with a unified view of cross-channel analytics across vendors.
- Smart Automation: Automate synchronization, refreshing, and notification triggers, allowing more focus on critical tasks.
- Quick Scalability: SuprSend automates scalability, putting it on autopilot for a hassle-free experience.
Cons:
- Cost Considerations: Managing multiple notification channels may incur costs. Monthly Notification Limits:
- Be mindful of limitations on the maximum number of notifications receivable per month.
Designed with a "developer-first" approach, SuprSend handles the heavy lifting, enabling engineering teams to concentrate on their tasks without the added complexity of managing notifications.
Getting Started with SuprSend for Sending emails in Node:
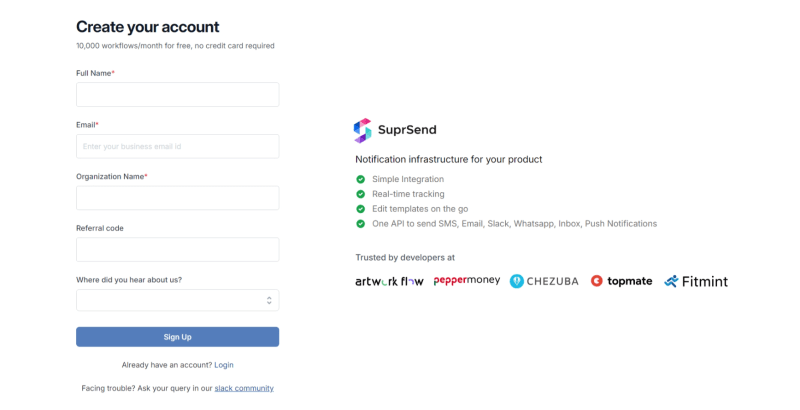
Step I: Log in to the SuprSend Account.
- Visit the SuprSend login page and enter your Email Address and Password. Try SuprSend for free.
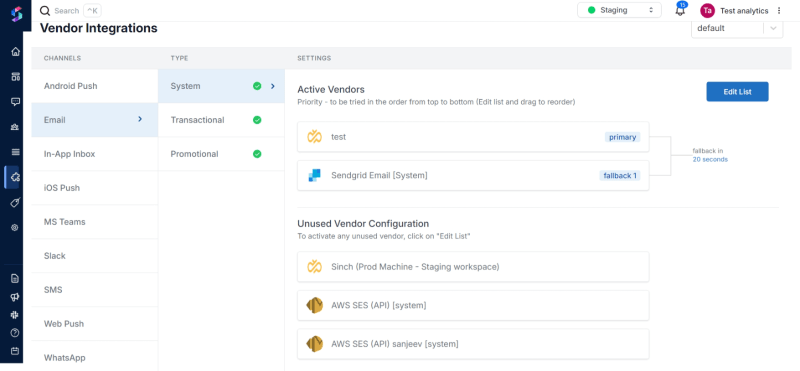
Step II: Integrate with Email(s).
- SuprSend provides a ready-to-integrate provider list for emails, including AWS SES, Mailchimp (Mandrill), Mailgun, Netcore, Outlook, Postmark, SendGrid, and more.
- After logging in, navigate to the integration section, choose the desired email channel, and enter the necessary information.
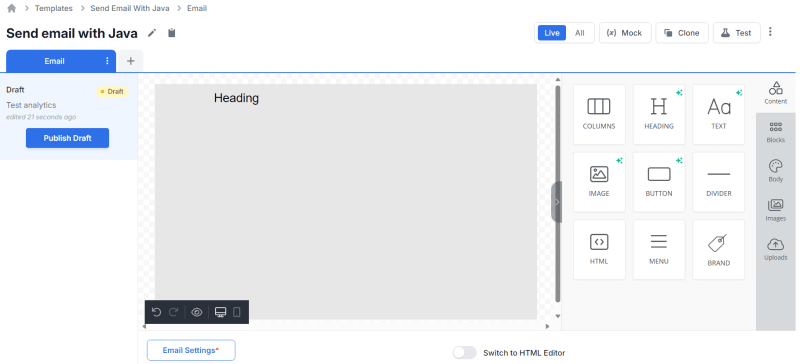
Step III: Create & Load Template.
- SuprSend allows you to create and store messaging content with a user-friendly drag & drop editor. To create a template, head to the "Templates" tab, click "Create," and then utilize the "Drag & Drop Editor" for customization.
Step IV: Create Smart Flow (Routing).
- Define rules and logic effortlessly by heading to the "Workflows" tab. Choose "Single Channel" and create a flow by adding basic details and logic conditions.
- Combine templates, providers, routes, and channels to fire notifications.
Step V: Trigger a Notification Event via API
Following this step, we'll integrate the SuprSend API into our Node application. Begin by updating the Maven pom.xml file with the provided dependency and execute mvn compile to download the necessary components. More info in documentation.
Installation using npm or yarn
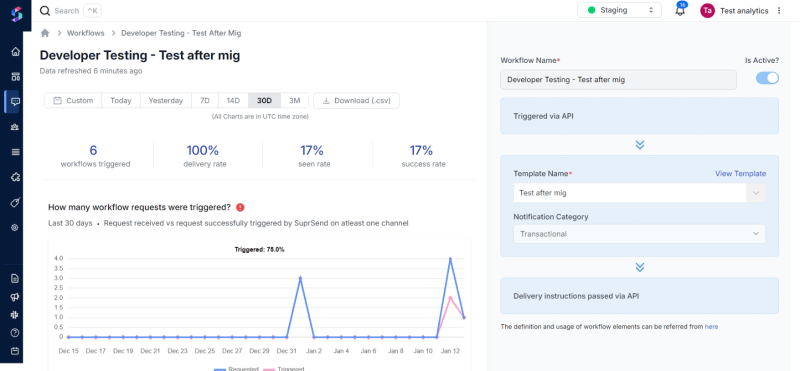
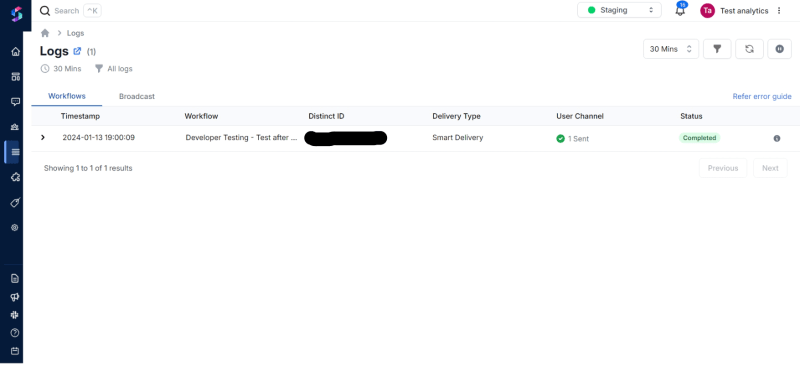
Step VI: Check Event Analytics And Logs.
- Gain granular channel-wise and vendor-wise analytics through the unified dashboard. View "Event Analytics" for actionable insights and access detailed logs through the "Logs" tab. Explore more about logs.
By following the steps outlined in this article, you can seamlessly integrate email functionality into your Node projects, facilitating communication with users and enhancing the overall user experience.