Integrating a SuprSend Angular notification center within your app can significantly enhance the user experience by providing a centralized hub for viewing, interacting with, and managing in-app notifications.
With SuprSend’s Angular SDK, you can implement a feature-rich, customizable In-App Inbox Notification Center with minimal effort. This guide will walk you through the process of setting up an in-app notification center with SuprSend and highlight its key features.
Why Build an In-App Inbox in Angular?
An in-app inbox (or notification center) provides:
- Persistent alerts users can refer back to
- Personalized messages based on user behavior
- Real-time notification infrastructure without relying on external push
- A message hub for system alerts, marketing messages, and app events
- A scalable alternative to building notification features from scratch
This makes in-app inboxes critical for SaaS products, marketplaces, and user-focused applications.
How In-App Notification Centers are Designed
Designing an in-app notification center from scratch can be complex. You need to manage multiple components, such as user identification, message storage, real-time updates, and UI elements.

The SuprSend SDK handles most of these for you, offering a ready-made solution that you can customize to fit your needs. Below is a breakdown of the main components involved in setting up an in-app inbox:
- User Identification – Personalize notifications by identifying individual users through a unique user ID or subscription key.
- Message Handling – Manage the storage, display, and update of messages within the app.
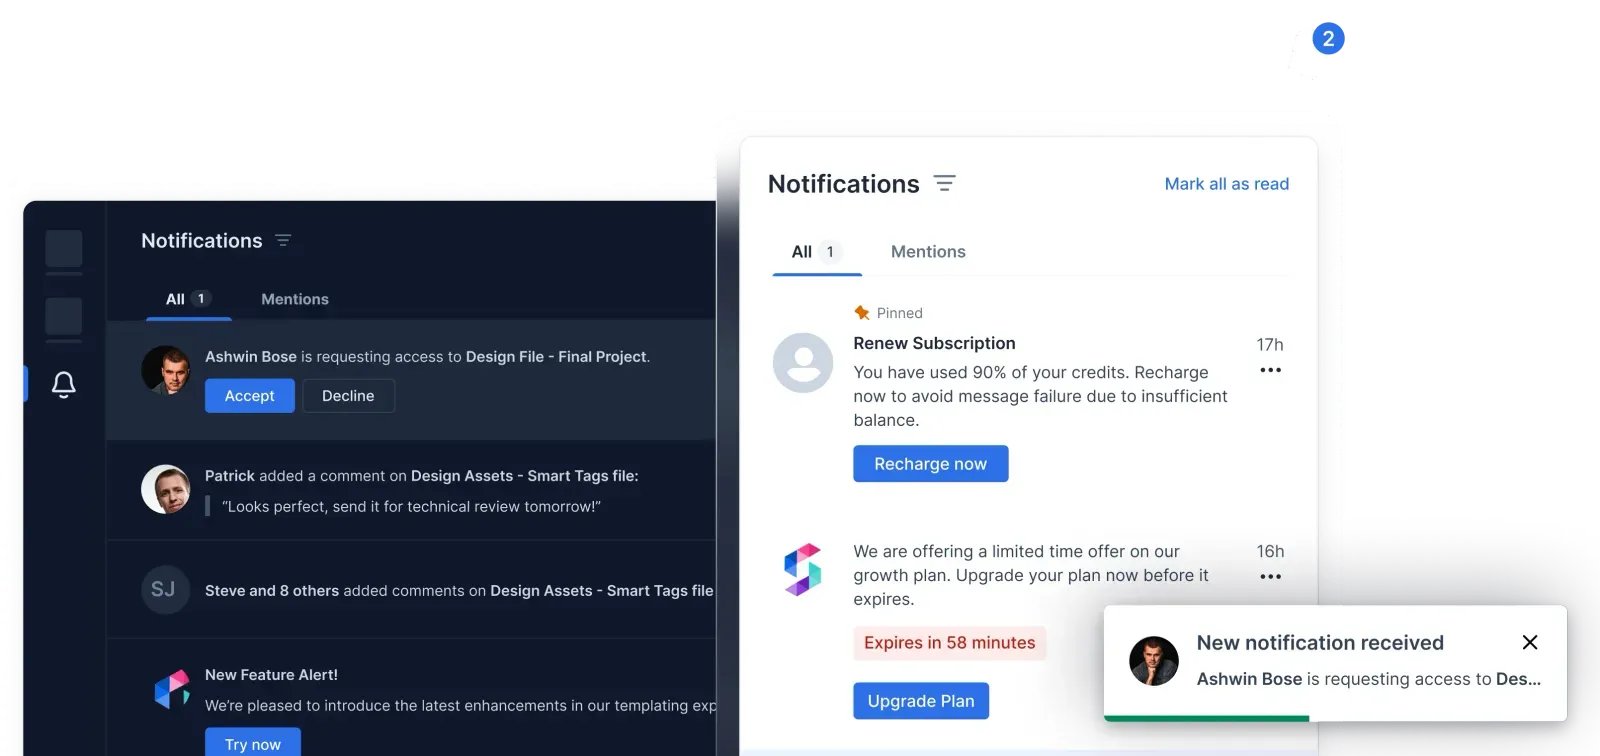
- UI Components – Create a visual interface where users can interact with their notifications. This includes features like unread counters, bell icons, and toast notifications.
- Customization – Tailor the inbox's appearance and behavior, including notification cards, headers, action buttons, and more.
SuprSend’s SDK abstracts most of these complexities, offering you a quick and efficient setup while allowing for deep customization if needed.
How To Add In-App Notifications To Your Angular App
Prerequisites
Before integrating SuprSend’s notification center, ensure you have an Angular app ready to go.
You can learn how to build an Angular app from scratch from here Angular - Build your first Angular app
You can build a basic Angular app using a local installation of the Angular tools or by using StackBlitz in a web browser. Local Angular development can be completed on Windows, MacOS or Linux based systems.
Step 1: Sign Up on SuprSend
Visit SuprSend’s official website, sign up, and create your workspace. Once set up, you’ll receive a workspace key and secret, which you’ll use to authenticate your app’s connection to SuprSend’s services.
How to Add a Notification Center Quickly with SuprSend
Setting up the notification center is straightforward and can be done in just a few steps.
Installation
Start by installing SuprSend’s Angular SDK, along with the necessary dependencies like js-inbox and Popper.js.
npm install @suprsend/ngx-inbox @suprsend/js-inbox @popperjs/core
Initialization
Next, initialize the SuprSend inbox module in your Angular app by importing SuprSendInboxModule into your app module. Don’t forget to provide your workspace key and secret.
import { SuprSendInboxModule } from '@suprsend/ngx-inbox';
@NgModule({
imports: [
SuprSendInboxModule.forRoot({
workspaceKey: 'your workspaceKey',
workspaceSecret: 'your workspaceSecret',
}),
],
})
export class AppModule {}
User Identification
To send personalized notifications, identify users by passing their distinct_id and subscriber_id:
import { SuprSendInboxService } from '@suprsend/ngx-inbox';
export class MyComponent implements OnInit {
constructor(private ssinbox: SuprSendInboxService) {}
async ngOnInit() {
this.ssinbox.identifyUser('distinct_id', 'subscriber_id');
}
}
Testing
Finally, you can integrate the notification center in your app's UI and test it:
<suprsend-inbox></suprsend-inbox>
Feature-Rich SuprSend Inbox: What It Offers
SuprSend’s inbox has features that help streamline user engagement and simplify notification management. Some of the key features include:
1. Action Buttons: Notifications can include primary and secondary action buttons to allow users to respond or perform an action directly from the notification.
- Customization: You can customize the styling of both action buttons and set custom click handlers.
<SuprsendInbox
  theme={{
    notification: {
      actions: [
        {
          container: { backgroundColor: 'blue' },
          text: { color: 'white' }
        },
        {
          container: { backgroundColor: 'gray' },
          text: { color: 'yellow' }
        }
      ]
    }
  }}
  primaryActionClickHandler={(data) => handlePrimaryAction(data)}
  secondaryActionClickHandler={(data) => handleSecondaryAction(data)}
/>
2. Notification Status Tracking: The platform provides real-time tracking of notifications’ read/unread status. This data can be analyzed to gain insights into user engagement.
- Customization: You can add custom click handlers to respond to users' interactions with notifications.
<SuprsendInbox
notificationClickHandler={(notificationData) => handleNotificationClick(notificationData)}
/>
3 .Tabs and Filters: Notifications can be categorized and organized using tabs and filters. This helps users navigate notifications more easily, improving the overall user experience.
- Customization: You can adjust the style of tabs and filters, or even hide certain tabs or counters based on your design preferences.
<SuprsendInbox
theme={{ tabs: { color: 'red', unselectedColor: 'gray', bottomColor: 'blue' } }}
/>
4. Expiry Timer Configuration
The expiry feature allows you to add an expiration timer to notifications with customizable styling options.
5. Pinning Feature
The pinning feature allows users to pin important notifications for quick access.
6. Mark as Read/Unread: Users can easily mark notifications as read or unread. This helps them prioritize and manage important information. The notification card visually indicates its read status by toggling between different styles for read and unread messages.
- Customization: Use the notificationComponent prop to create custom behavior for marking notifications as read or unread.
<SuprsendInbox
notificationComponent={({ notificationData, markRead, markUnRead }) => (
<CustomNotificationCard
data={notificationData}
markAsRead={markRead}
markAsUnRead={markUnRead}
/>
)}
/>
7. Cross-Browser and Device Sync: Notifications are synchronized across all devices and browsers. Whether a user reads a notification on their desktop or mobile, SuprSend ensures their actions are synced in real-time, providing a seamless experience.
Customization Options
SuprSend’s appinbox component is not just feature-rich; it’s also highly customizable. Here's a breakdown of how you can modify the inbox to fit your app's unique design needs:
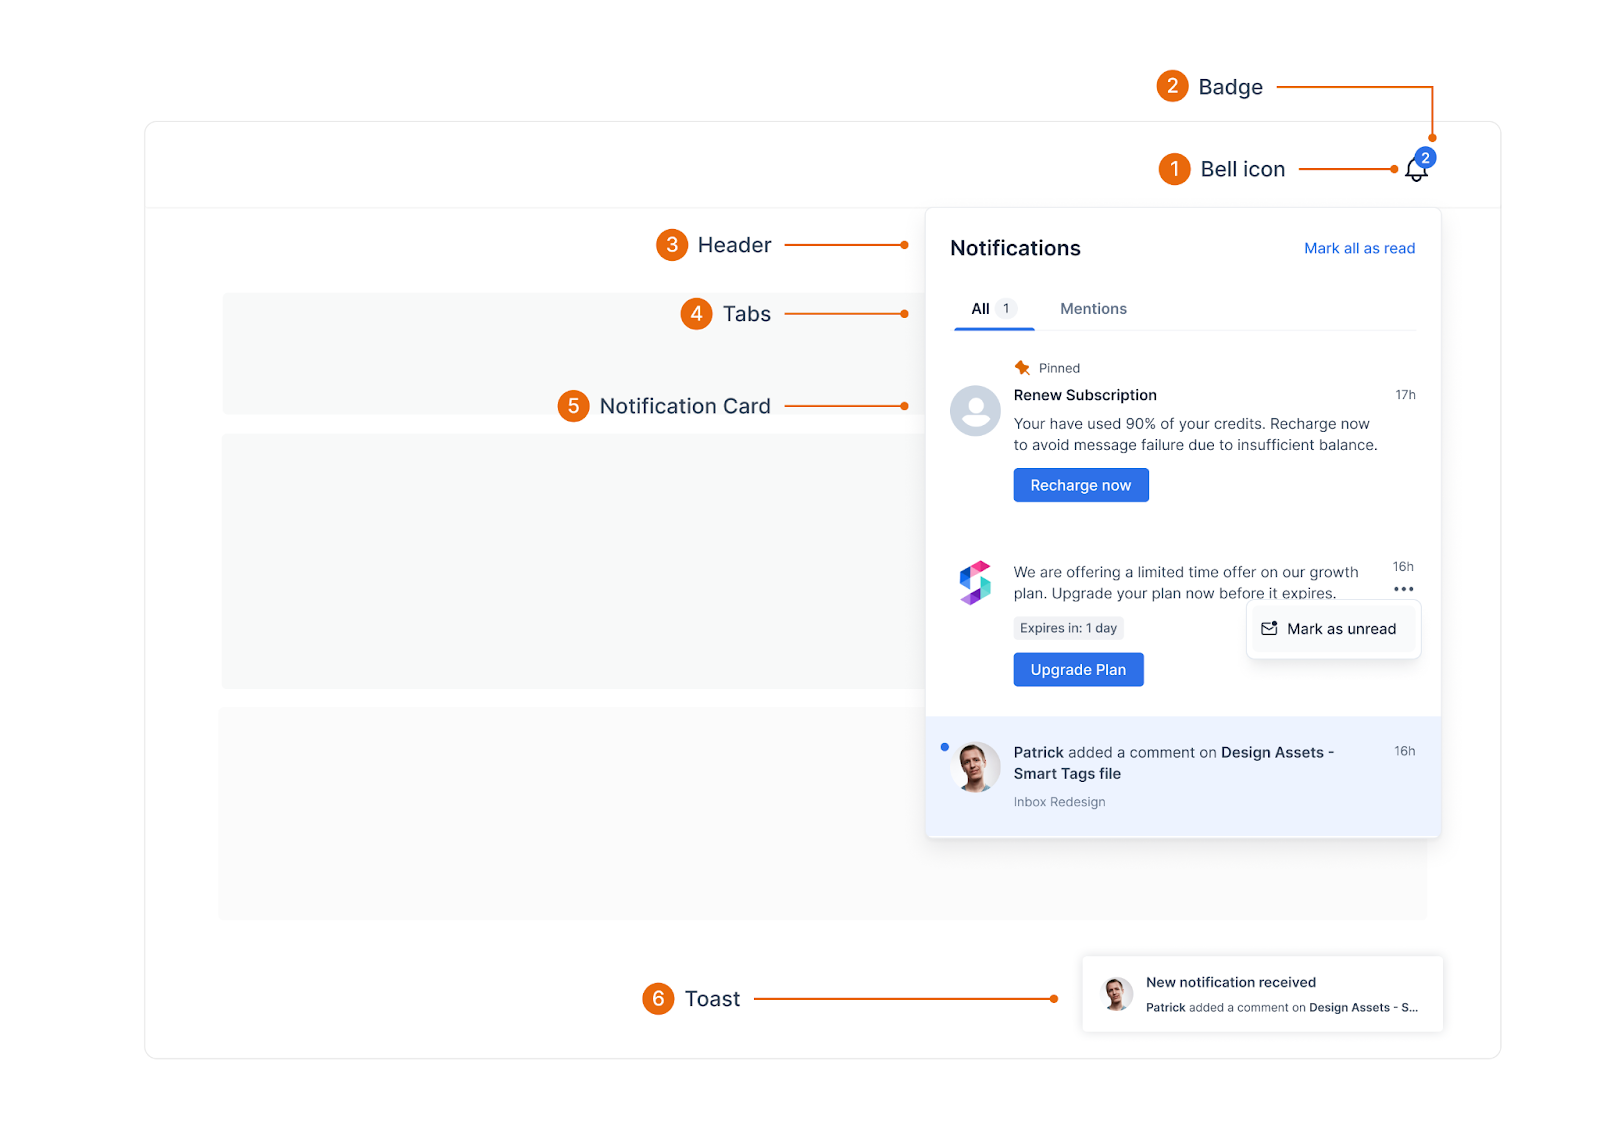
1. Inbox Theme Customization: SuprSend angular inapp inbox supports both light and dark themes by default, but you can fully control the styling using the theme prop.
<SuprsendInbox themeType="light" />
<SuprsendInbox themeType="dark" />
For more advanced styling, you can provide custom CSS properties for specific elements like the header, body, or action buttons.
<SuprsendInbox
theme={{
header: { container: { backgroundColor: 'black' }, headertext: { color: 'white' } },
notification: { container: { unreadBackgroundColor: 'lightgray', readBackgroundColor: 'white' } }
}}
/>
2. Customizing Notification Cards: Notification cards can be styled based on their state (read/unread). You can also customize the look of individual parts, like the header text, body text, or action buttons.
<SuprsendInbox
theme={{
notification: {
container: { unreadBackgroundColor: 'lightblue', readBackgroundColor: 'lightgray' },
headerText: { color: 'darkblue' },
bodyText: { color: '#333' },
unseenDot: { backgroundColor: 'red' }
}
}}
/>
3. Custom Bell Icon: You can modify the default bell icon or provide a custom bell component.
<SuprsendInbox
bellComponent={() => <CustomBellIcon />}
theme={{ bell: { color: 'green' } }}
/>
4. Custom Badge (Notification Counter): The badge component, which shows the number of unseen notifications, is fully customizable. You can change its style or pass your own badge component.
<SuprsendInbox
badgeComponent={({ count }) => <CustomBadge count={count} />}
theme={{ badge: { backgroundColor: 'pink', color: 'white' } }}
/>
You can check out this documentation to find more about customizations: Embeddable Inbox (suprsend.com)
Test the Notification Center
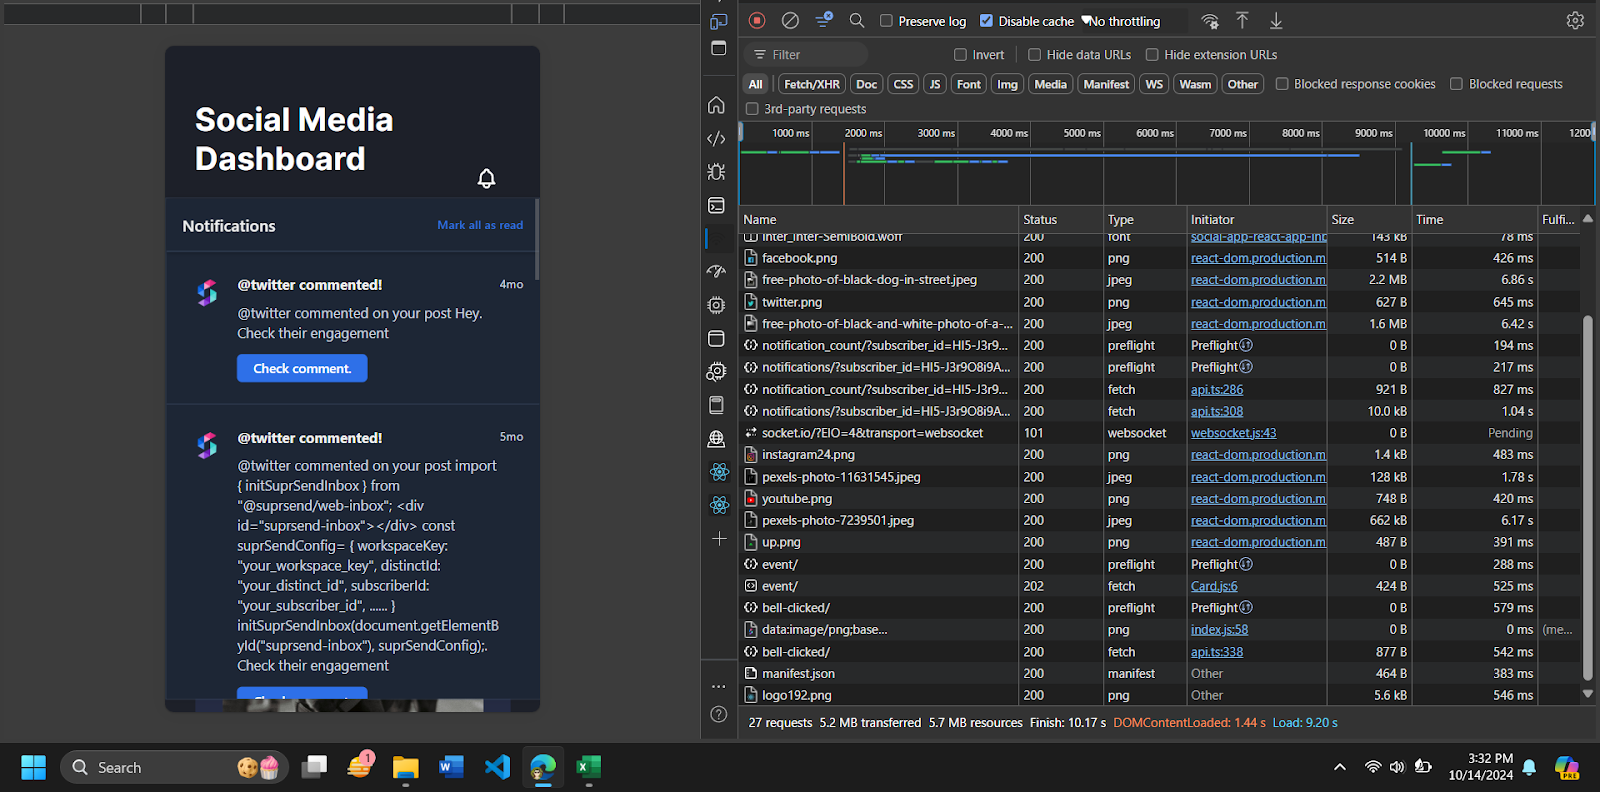
Testing is an essential step to ensure your notification center functions correctly. Use SuprSend’s built-in tools to test real-time notifications, user identification, and customization options within different environments and devices. You can analyze if an app inbox is initialized by checking the logs section on SuprSend.
You can also check if the API events are passed correctly by checking your browser’s Network console.
You can also test the notification workflow from the Test Workflow button on the Workflow dashboard.

Why Choose SuprSend Over Building Your Own In-App Notification Center
Building a fully functional notification center from scratch requires significant resources, including time and technical expertise. SuprSend streamlines this process by offering:
- Ready-to-use SDKs in all major languages.
- React components and example apps to embed Inbox UI in your product quickly.
- Customization options to fit your product’s branding and design.
- Scalable and reliable service, without any infra setup or maintenance.
- Advanced features like action buttons, language translation, state management (mark as read/unread, archive), toasts, pinning and expiry.
- Real-time feed and cross-browser / device compatibility using web socket.
What are the benefits of in-app notifications for your Angular app?
An In-App Inbox Notification Center is more than just a notification feed, it’s a user engagement hub delivering real-time updates within the app. Let's explore the key benefits of adding an in-app notification system:
1. Delivering Real-Time Updates
Ensure your users receive immediate alerts and information without relying on external channels. With real-time notifications, users remain informed about important events and changes directly within the app.
2. Boosting User Engagement
In-app notification in Angular encourages interaction without disrupting the user experience. Users can review, dismiss, or act on messages seamlessly, boosting their overall engagement with your application.
3. Personalized Communication
Tailor notifications to individual users based on their behavior and preferences. This leads to more relevant and impactful messaging, increasing the chances of user interaction.
4. Persistent Messaging
Unlike traditional notifications that vanish after dismissal, in-app notifications remain accessible until the user interacts with them. This ensures that critical information is not missed and can be revisited later.
5. Unified Notification Hub
Manage notifications from various sources, such as marketing campaigns, in-app activities, and system alerts, within a single interface. This makes it easy for users to track all messages in one place.
6. Actionable Notifications
Include buttons or links in your notifications to allow users to take action immediately, improving the efficiency of your communication.
7. Cross-Device Sync
Ensure notifications are synchronized across different devices and browsers. SuprSend’s inbox supports seamless syncing, providing a consistent experience for users.
Conclusion
Integrating SuprSend’s In-App Inbox Notification Center into your Angular application is a smart, efficient way to boost user engagement and streamline communication.
Whether you’re delivering real-time updates or personalizing user experiences, SuprSend offers a robust, customizable solution that’s quick to implement and easy to maintain.
For more detailed documentation, explore SuprSend’s official documentation here.
FAQs: SuprSend In-App Inbox in Angular
❓ What is SuprSend's in-app inbox?
SuprSend’s in-app inbox is a customizable notification center that lives inside your app, letting users see, manage, and interact with notifications in real-time.
❓ What’s the difference between in-app messaging and inbox?
In-app messaging is typically transient (like toasts). An in-app inbox persists messages, lets users revisit old notifications, and supports richer interactions.
❓ Is SuprSend’s inbox SDK open source?
The SDK itself is proprietary but built on open standards. You can integrate it easily without worrying about maintenance or infrastructure.
❓ Can I use SuprSend for cross-device syncing?
Yes, SuprSend syncs inbox states across desktop, mobile, and web sessions in real-time using sockets.
❓ What types of apps benefit most from an in-app inbox?
- SaaS platforms
- Fintech apps
- Marketplaces
- Social platforms
- Developer tools
- Edtech and productivity apps