Last Updated: May 2026
Building a notification system from scratch - with multi-channel delivery, template management, and user preferences - typically takes 2-4 weeks of engineering time. But using a notification infrastructure platform, you can send your first multi-channel alert (email + in-app + push) in under 30 minutes.
This tutorial walks through a complete notification system setup, from zero to a working multi-channel notification. You'll trigger a notification from your backend, and it will arrive as an email, an in-app notification, and a push notification - all from a single API call. No separate integrations for each channel. No custom template engine. No delivery tracking code.
What We're Building
By the end of this tutorial, you'll have a working notification system that does the following:
1. Accepts an event from your backend (e.g., "new_comment" or "payment_received").
2. Routes the notification through a workflow that determines timing, channels, and content.
3. Delivers the notification across email, in-app inbox, and (optionally) push - from a single API call.
4. Tracks delivery status with step-by-step logs.
We'll use SuprSend as the notification platform. The concepts apply to any notification infrastructure platform, but the specific API calls and SDK references use SuprSend's implementation.
Prerequisites
Step 1: Create Your SuprSend Workspace
Sign up at suprsend.com/signup. The free tier includes 10,000 notifications per month across all channels - more than enough for development and testing.
After signing up, you'll land on the dashboard. Navigate to Settings → API Keys and note your Workspace Key and Workspace Secret. These authenticate your backend API calls.
Step 2: Install the SDK
Python:
pip install suprsend-py-sdk
Node.js:
npm install @suprsend/node-sdk
Step 3: Create a Notification Template
Templates define what your notification looks like on each channel. In the SuprSend dashboard, go to Templates → Create Template.
Create a template called new_comment with content for each channel:
Email: Subject: "{{commenter_name}} commented on your post" / Body: A simple HTML email with the comment preview and a link to view it.
In-App: Header: "New comment from {{commenter_name}}" / Body: "{{comment_preview}}" / Action URL: "{{post_url}}"
Push: Title: "New comment" / Body: "{{commenter_name}}: {{comment_preview}}"
The double-curly-brace variables ({{commenter_name}}, {{comment_preview}}, {{post_url}}) are dynamic - you'll pass their values in the API call. The WYSIWYG editor handles email layout without writing HTML.
Step 4: Create a Workflow
Workflows determine the orchestration logic - which channels to use, in what order, with what timing. Go to Workflows → Create Workflow.
For this tutorial, create a simple workflow called comment-notification:
Step 1: Send via In-App (immediate) + Push (immediate). These real-time channels deliver first for users who are active.
Step 2: Wait 5 minutes. If the user hasn't seen the in-app notification, fall back to email.
Step 3: Send via Email (fallback).
This is a basic channel waterfall - try fast channels first, fall back to persistent channels if the user doesn't engage. The visual workflow builder lets you drag and drop these steps without code.
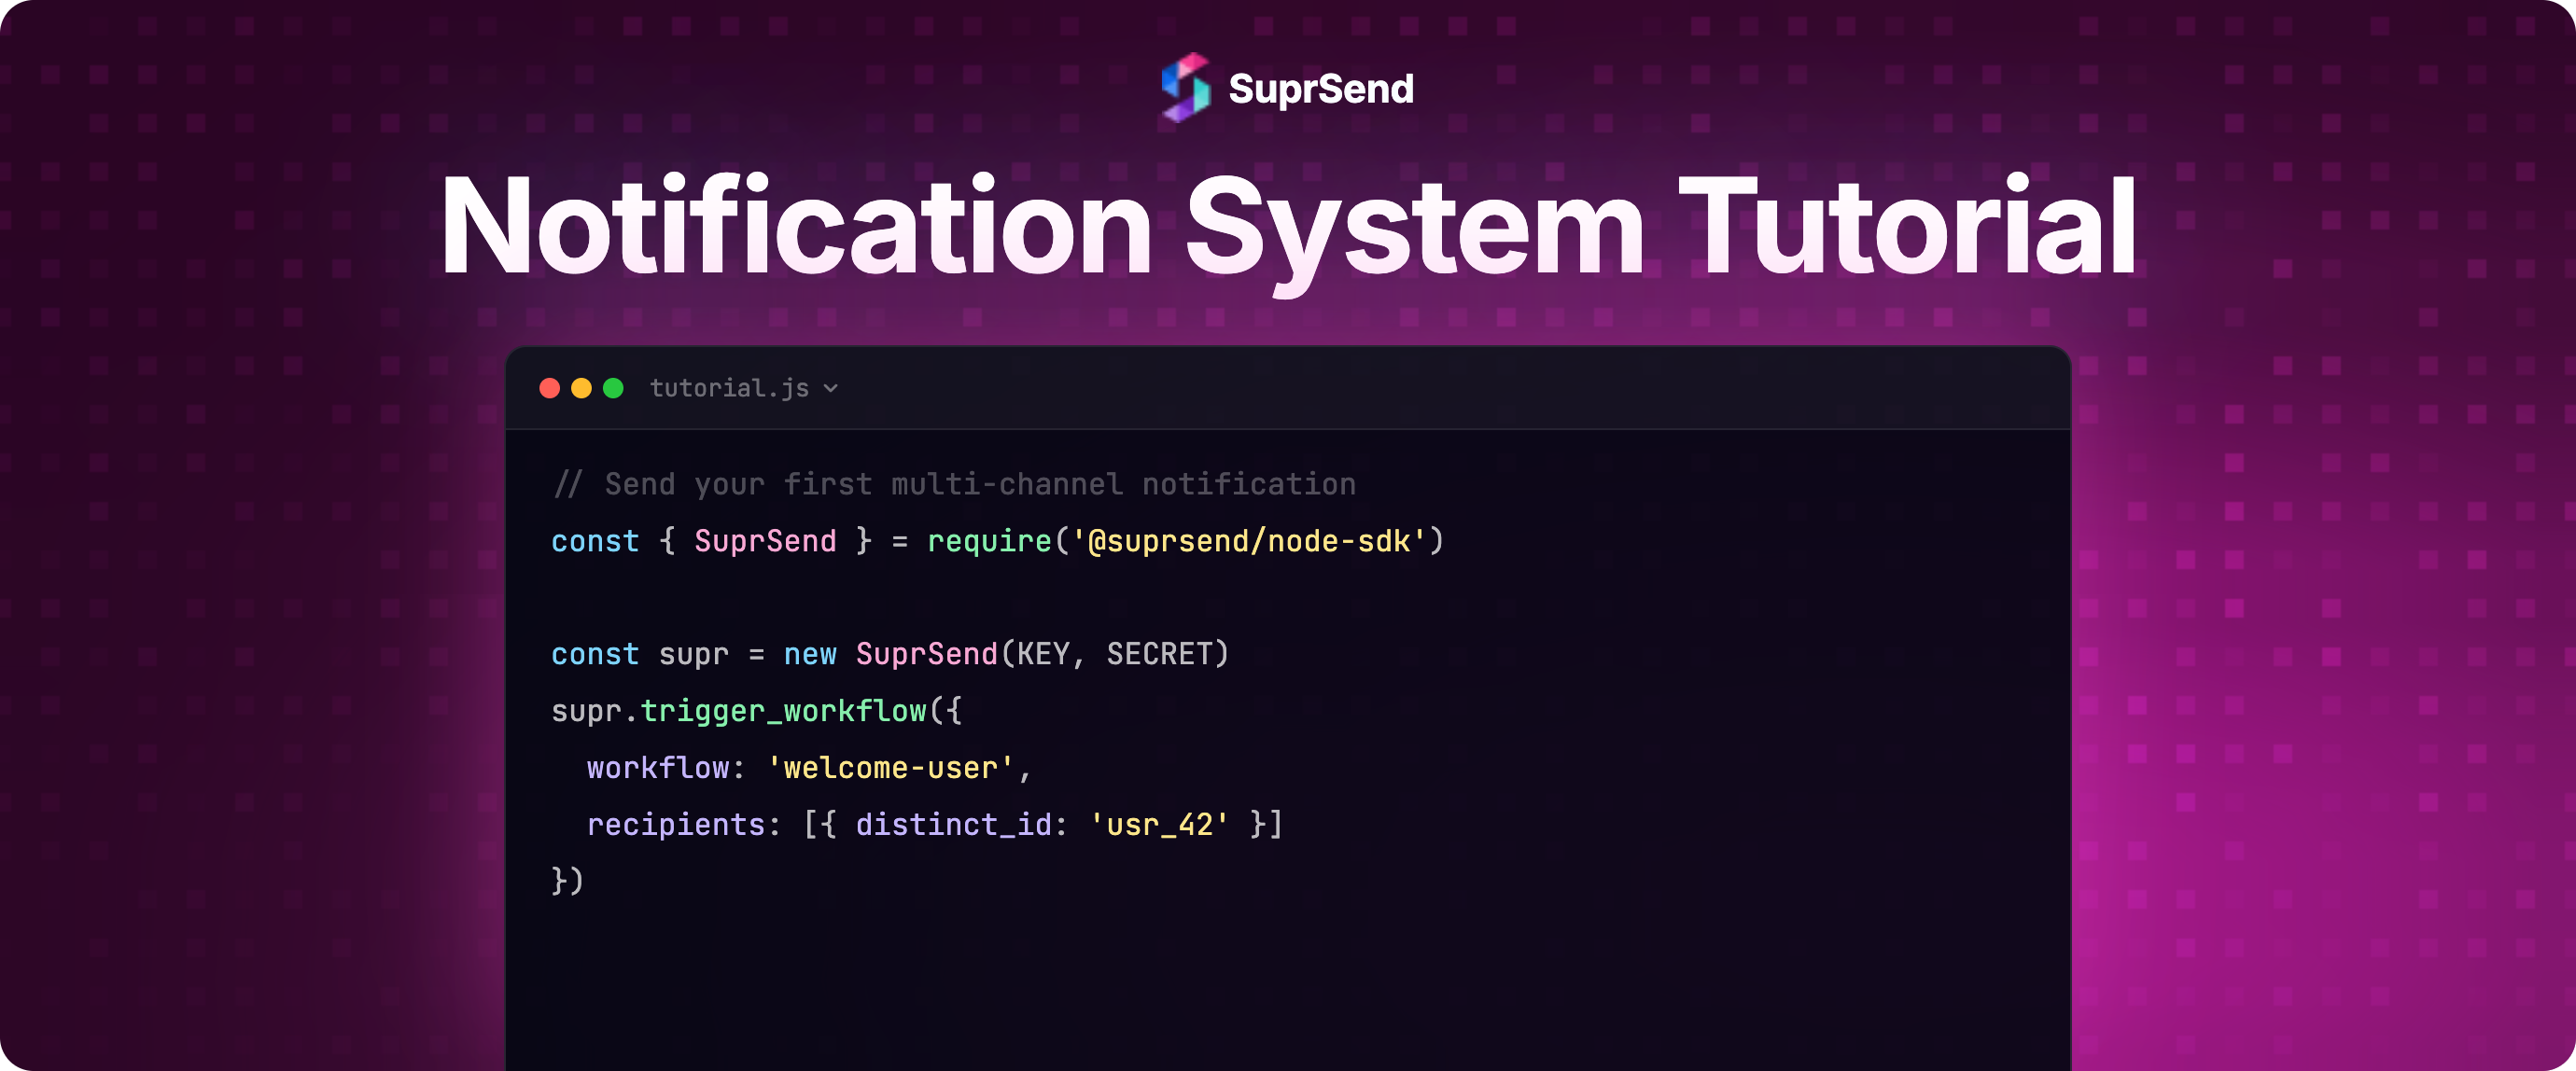
Step 5: Trigger a Notification from Your Backend
Python example:
from suprsend import Suprsend

# Initialize the SDK
supr_client = Suprsend("your_workspace_key", "your_workspace_secret")

# Trigger the workflow
workflow_body = {
    "name": "comment-notification",
    "template": "new_comment",
    "notification_category": "comments",
    "users": [
        {
            "distinct_id": "user_123",
            "$email": ["user@example.com"],
            "$push": [{"token": "fcm_token_here", "provider": "fcm", "device_id": "device_1"}]
        }
    ],
    "data": {
        "commenter_name": "Sarah Chen",
        "comment_preview": "Great analysis! I think the pricing model...",
        "post_url": "https://app.yourproduct.com/posts/456"
    }
}

response = supr_client.workflows.trigger(workflow_body)
print(response)
Node.js example:
const { Suprsend } = require('@suprsend/node-sdk');

const suprClient = new Suprsend('your_workspace_key', 'your_workspace_secret');

const workflowBody = {
  name: 'comment-notification',
  template: 'new_comment',
  notification_category: 'comments',
  users: [
    {
      distinct_id: 'user_123',
      $email: ['user@example.com'],
      $push: [{ token: 'fcm_token_here', provider: 'fcm', device_id: 'device_1' }]
    }
  ],
  data: {
    commenter_name: 'Sarah Chen',
    comment_preview: 'Great analysis! I think the pricing model...',
    post_url: 'https://app.yourproduct.com/posts/456'
  }
};

const response = await suprClient.workflows.trigger(workflowBody);
console.log(response);
That's it. One API call. The platform handles template rendering for each channel, applies the workflow logic (in-app + push first, email fallback after 5 minutes), checks user preferences, and routes to the appropriate delivery provider.
Step 6: Add the In-App Inbox (Frontend)
For in-app notifications to appear in your product, add the SuprSend inbox SDK to your frontend. Here's the React implementation:
npm install @suprsend/react-inboximport SuprSendInbox from '@suprsend/react-inbox';

function NotificationBell() {
  return (
    <SuprSendInbox
      workspaceKey="your_workspace_key"
      subscriberId="user_123"
      distinctId="user_123"
    />
  );
}
This renders a notification bell icon with an unread count badge. Clicking it opens the inbox with all notifications. The SDK handles WebSocket connections for real-time delivery, read/unread state management, and cross-device synchronization automatically.
SDKs are also available for Vue, Angular, Flutter, Android (Kotlin/Java), and iOS (Swift).
Step 7: Verify Delivery with Logs
Go to Logs in the SuprSend dashboard. You'll see a step-by-step trace for every notification: event received → workflow triggered → template rendered → channel selected → provider called → delivery status. If a notification wasn't delivered, the log shows exactly why - whether a preference blocked it, a provider returned an error, or the user's channel data was missing.
This observability is the difference between spending 5 minutes and 5 hours debugging a notification issue.
Next Steps: Extending Your Notification System
With the basic tutorial complete, here's what to add next:
User preferences. Add SuprSend's preference center component to let users control which notification categories they receive and through which channels. Takes ~15 minutes to integrate.
Batching/digest. For high-frequency events (like multiple comments in quick succession), configure batching in the workflow to aggregate "5 new comments" into a single notification instead of sending 5 separate ones.
More channels. Add SMS for urgent alerts (payment failures, security events). Add Slack or MS Teams for B2B products where users live in those tools. Each channel is configured in the dashboard - no additional API integration needed.
Multi-tenancy. If you serve multiple customers, add a tenant_id to your API calls to enable per-customer branding on notifications.
Build vs Integrate: Time Comparison
Frequently Asked Questions
How long does it take to build a basic notification system?
With a notification platform like SuprSend, you can send your first multi-channel notification in under 30 minutes. Building from scratch with direct provider integrations (SendGrid, FCM, APNs) typically takes 2-4 weeks for a production-ready system with templates, workflows, and delivery tracking.
What programming languages can I use?
Most notification platforms offer SDKs in Python, Node.js, Java, Go, and Ruby. SuprSend supports all of these plus provides REST API access for any language. The examples in this tutorial use Python and Node.js, but the concepts apply to any language.
Do I need separate integrations for each notification channel?
With a notification platform, no. A single API call triggers the notification, and the platform handles routing to email, push, in-app, SMS, or any other configured channel based on your workflow logic and user preferences.
How do I test notifications without sending to real users?
Use the platform's test mode or sandbox environment. SuprSend provides workspace-level test mode that logs notifications without delivering them to real providers. You can also create test users with your own email and phone number for end-to-end testing.
Can I add notification preferences for users?
Yes. After completing the basic setup in this tutorial, you can add SuprSend's pre-built preference center component to let users control which notifications they receive and through which channels. This takes an additional 15-20 minutes to integrate.
What's the difference between a notification system and a notification service?
They're often used interchangeably. A notification system refers to the broader architecture including event triggers, workflows, templates, and delivery. A notification service typically refers to the specific backend component or platform that handles orchestration and delivery within that architecture.
TL;DR: This tutorial demonstrates building a multi-channel notification system in 30 minutes using SuprSend. One API call triggers notifications across email, in-app, and push. The platform handles template rendering, workflow orchestration, channel routing, and delivery tracking. From there, add user preferences, batching, and additional channels incrementally.
Ready to build your notification system? Start building for free with SuprSend's 10K notifications/month free tier, or book a demo for a guided walkthrough.